Tutorial
In this tutorial we will explore various aspects of the pg framework from
opening a window to flying through a scene of several geometric objects.
Creating a Window
The first step in any pg program is to create an App object. This
object owns the main window loop. Then you can instantiate one or more
Window objects:
import pg

app = pg.App()
pg.Window()
app.run()
This will create your first blank window. However, typically we will want
to extend the Window class to add our own functionality. We should also
only construct and run the App inside of a __main__ block:
import pg

class Window(pg.Window):
    pass

if __name__ == "__main__":
    app = pg.App()
    Window()
    app.run()
This __main__ block is so common that pg includes a shortcut:
if __name__ == "__main__":
    pg.run(Window)
Note that the run function takes a Window class, not an instance.
Window Lifecycle
Typically we will override several methods in the Window class. Together,
these methods manage the lifecycle of the Window.
setup(): code to be run once when the window is createdupdate(t, dt): called each frame with elapsed time and time since last framedraw(): called each frame for rendering the sceneteardown(): cleanup to be performed when the window is closed
Here is a basic code template for starting a new pg project:
import pg

class Window(pg.Window):
    def setup(self):
        pass
    def update(self, t, dt):
        pass
    def draw(self):
        pass
    def teardown(self):
        pass

if __name__ == "__main__":
    pg.run(Window)
GLSL Shaders and Programs
Modern OpenGL uses shaders and programs in place of the deprecated,
fixed-function pipeline. pg provides classes to easily work with shaders
and even includes some built-in shaders with basic functionality.
In our Window.setup function we should load and compile a shader program
that will render our geometric primitives. One of the built-in shaders is
SolidColorProgram which renders all primitives with the specified color:
self.program = pg.SolidColorProgram()
To hold the configuration for our program, we must use a Context. Multiple
contexts can be created for a single program:
self.context = pg.Context(self.program)
Now, we can set attributes on the context corresponding to the attributes and
uniforms defined in the vertex and fragment shaders. The SolidColorProgram
defines a color uniform. Let’s set it to white:
self.context.color = (1, 1, 1)
If you wanted to use your own vertex and fragment shaders, you would simply do the following instead:
self.program = pg.Program(vs, fs)
vs and fs can be the shader source code or a filename or instances of
VertexShader and FragmentShader, respectively.
Our setup function is not yet complete but looks like this:
def setup(self):
    self.program = pg.SolidColorProgram()
    self.context = pg.Context(self.program)
    self.context.color = (1, 1, 1)
Built-in Geometric Shapes
pg includes functions for generating several 3-dimensional primitives
including spheres, cuboids, cylinders, cones, planes, axes, etc.
Let’s create a sphere:
sphere = pg.Sphere(3, 0.5, (0, 0, 0))
The first argument, detail, indicates how detailed to make the sphere. It is the number of times to recursively split the triangles. The second argument specifies the radius and the third argument specifies the center of the sphere.
Vertex Buffers
The sphere object has lists specifying its vertex positions, normals and
texture coordinates. For the SolidColorProgram, we only need the positions.
Now it’s time to load this data into a vertex buffer so our graphics card can access it:
self.context.position = pg.VertexBuffer(sphere.positions)
Transformation Matrices
Dealing with matrices is a big part of using OpenGL. pg includes a
Matrix class that will help us with most scenarios.
For our code, we’ll set the camera position with a translation and we’ll use a perspective projection:
matrix = pg.Matrix()
matrix = matrix.translate((0, 0, -2))
matrix = matrix.perspective(65, self.aspect, 0.1, 100)
self.context.matrix = matrix
Now our setup function is complete:
def setup(self):
    self.program = pg.SolidColorProgram()
    self.context = pg.Context(self.program)
    self.context.color = (1, 1, 1)
    sphere = pg.Sphere(3, 0.5, (0, 0, 0))
    self.context.position = pg.VertexBuffer(sphere.positions)
    matrix = pg.Matrix()
    matrix = matrix.translate((0, 0, -2))
    matrix = matrix.perspective(65, self.aspect, 0.1, 100)
    self.context.matrix = matrix
Rendering
Finally, we can render the scene as shown below:
def draw(self):
    self.clear()
    self.context.draw(pg.GL_TRIANGLES)
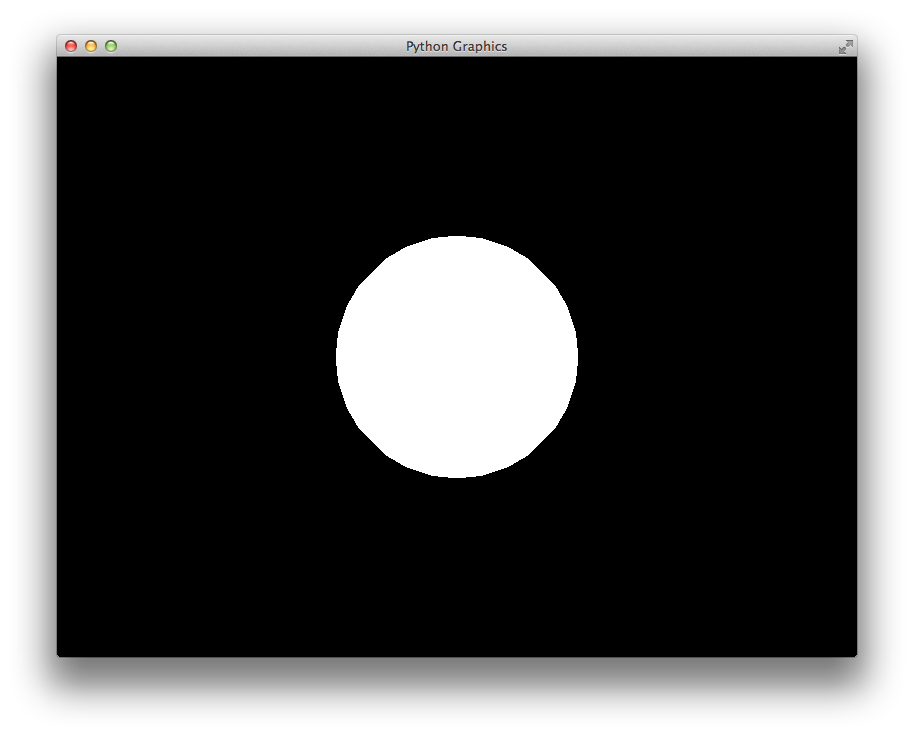
Because we’re using a single color without shading, our sphere just looks like a circle right now.
We can instead use the DirectionalLightProgram which renders the scene
with a single, directional light source. This program has several uniforms
that can be configured but most of them have sensible defaults. At a minimum
we should set the camera_position so that the lighting will look correct:
self.context.camera_position = (0, 0, 2)
We also now need to provide the sphere normal vectors to the program:
self.context.normal = pg.VertexBuffer(sphere.normals)
Here is the updated code:
class Window(pg.Window):
    def setup(self):
        self.program = pg.DirectionalLightProgram()
        self.context = pg.Context(self.program)
        sphere = pg.Sphere(3, 0.5, (0, 0, 0))
        self.context.position = pg.VertexBuffer(sphere.positions)
        self.context.normal = pg.VertexBuffer(sphere.normals)
        matrix = pg.Matrix()
        matrix = matrix.translate((0, 0, -2))
        matrix = matrix.perspective(65, self.aspect, 0.1, 100)
        self.context.matrix = matrix
        self.context.camera_position = (0, 0, 2)
    def draw(self):
        self.clear()
        self.context.draw(pg.GL_TRIANGLES)
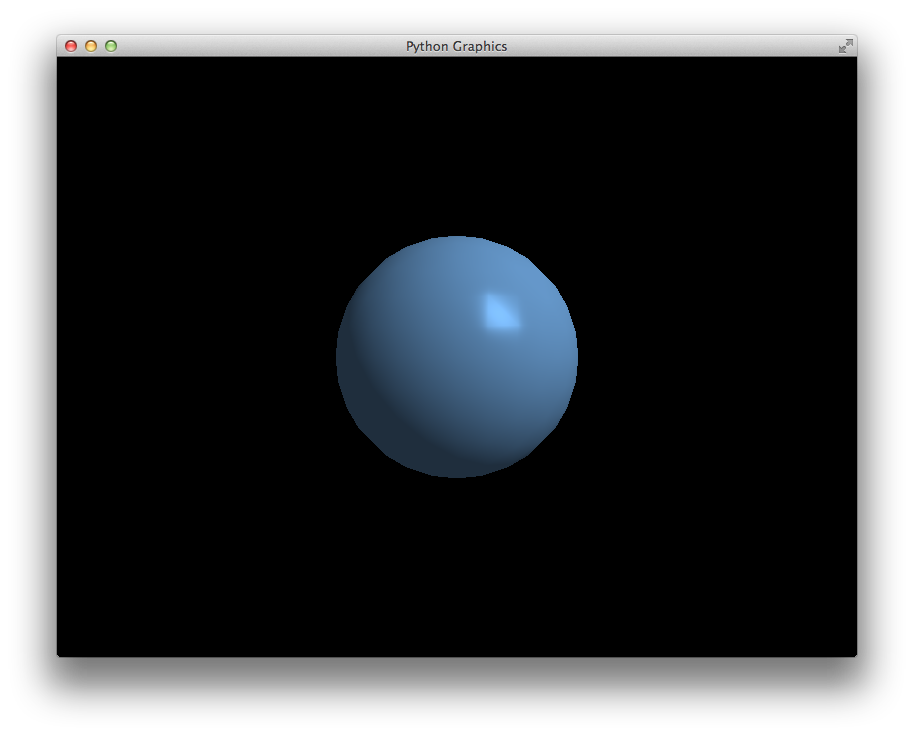
And here is what it looks like.
Flying Around with WASD
pg includes a WASD class that makes it incredibly easy to fly around
your scene. The WASD object hooks into your window’s keyboard and mouse
callbacks and provides you with a matrix with the translation and rotation
for the camera position.
First, let’s construct the WASD object in our setup function:
self.wasd = pg.WASD(self)
The initial camera position and viewing target can be set with
WASD.look_at:
self.wasd.look_at((0, 0, 2), (0, 0, 0))
Now we need to update our context’s matrix each frame. The matrix code is
removed from the setup function and goes in the update function
with a few changes:
def update(self, t, dt):
    matrix = self.wasd.get_matrix()
    matrix = matrix.perspective(65, self.aspect, 0.1, 100)
    self.context.matrix = matrix
    self.context.camera_position = self.wasd.position
Complete Example
import pg

class Window(pg.Window):
    def setup(self):
        self.wasd = pg.WASD(self)
        self.wasd.look_at((0, 0, 2), (0, 0, 0))
        self.program = pg.DirectionalLightProgram()
        self.context = pg.Context(self.program)
        sphere = pg.Sphere(3, 0.5, (0, 0, 0))
        self.context.position = pg.VertexBuffer(sphere.positions)
        self.context.normal = pg.VertexBuffer(sphere.normals)
    def update(self, t, dt):
        matrix = self.wasd.get_matrix()
        matrix = matrix.perspective(65, self.aspect, 0.1, 100)
        self.context.matrix = matrix
        self.context.camera_position = self.wasd.position
    def draw(self):
        self.clear()
        self.context.draw(pg.GL_TRIANGLES)

if __name__ == "__main__":
    pg.run(Window)